Are you tired of buying the same boring dresses from the store? Do you want to stand out in a crowd and showcase your unique style? Then it’s time to learn how to make your own custom dress! Making your own dress can be a fun and rewarding experience, and it’s a great way to get exactly what you want. In this guide, we’ll walk you through the steps of creating your own custom dress, from selecting the fabric to adding the finishing touches. Whether you’re a beginner or an experienced sewer, this guide has something for everyone. So grab your sewing machine and let’s get started!
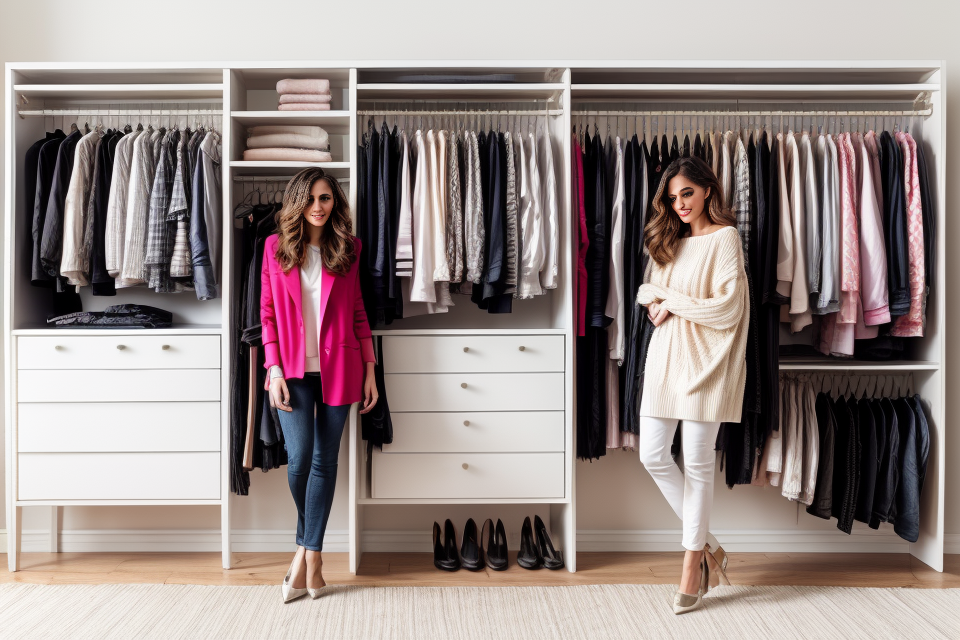
Choose the Fabric and Pattern
Choose a Pattern That Flatters Your Body Shape
Selecting the right pattern is crucial in creating a custom dress that flatters your body shape. To achieve the best results, consider the following factors:
- Body Type: Choose a pattern that complements your body type. For example, if you have an hourglass figure, a pattern with a fitted top and full skirt will flatter your curves. If you have a pear-shaped body, a pattern with a fitted top and straight or slightly flared skirt will create a balanced look.
- Style Preferences: Consider your personal style when selecting a pattern. If you prefer a classic look, choose a timeless pattern like a shift dress or sheath. If you want a more contemporary style, opt for a pattern with a modern twist, such as a geometric print or a asymmetrical hemline.
- Comfort: Choose a pattern that you feel comfortable in. Avoid patterns that are too tight or too loose, as they can detract from the overall look of the dress. Opt for a pattern that allows for a comfortable fit, and make any necessary adjustments to ensure a perfect fit.
- Occasion: Consider the occasion when choosing a pattern. For example, a floral print may be more appropriate for a summer wedding, while a jewel tone or metallic pattern may be better suited for a formal event.
By taking these factors into account, you can select a pattern that not only flatters your body shape but also complements your personal style and the occasion.
Select the Fabric Based on the Pattern and Your Skin Type
When choosing the fabric for your custom dress, it is important to consider both the pattern of the dress and your own skin type. Different fabrics have different properties that can affect how the dress looks and feels, as well as how it behaves in different weather conditions.
Here are some factors to consider when selecting the fabric for your custom dress:
- Texture: The texture of the fabric can affect the overall look and feel of the dress. For example, a dress with a floral pattern may look better in a fabric with a smooth, silky texture, while a dress with a geometric pattern may look better in a fabric with a more textured, rugged texture.
- Weight: The weight of the fabric can also affect the look and feel of the dress. A heavier fabric, such as wool or denim, may be more suitable for colder weather, while a lighter fabric, such as cotton or silk, may be more suitable for warmer weather.
- Color: The color of the fabric can also affect the overall look of the dress. For example, a dress with a bold, bright pattern may look better in a fabric with a solid, contrasting color, while a dress with a more subtle pattern may look better in a fabric with a more muted, complementary color.
- Skin Type: Finally, it is important to consider your own skin type when selecting the fabric for your custom dress. For example, if you have sensitive skin, you may want to avoid fabrics that are rough or irritating, such as wool or denim. On the other hand, if you have dry skin, you may want to choose a fabric that is soft and moisturizing, such as silk or cotton.
By considering these factors, you can select the best fabric for your custom dress, ensuring that it looks and feels great, and is suitable for the occasion and the weather conditions.
Gather Supplies and Tools
Basic Sewing Supplies
Creating your own custom dress requires a few essential sewing supplies and tools. Here’s a list of the basic supplies you’ll need to get started:
- Fabric: Choose the type of fabric you want for your dress. This can be anything from cotton, silk, lace, or a combination of different fabrics. The type of fabric you choose will affect the final look and feel of your dress.
- Sewing Machine: A sewing machine is necessary for sewing your dress together. There are various types of sewing machines available, from basic models to more advanced ones. Choose a machine that suits your skill level and sewing needs.
- Thread: Sewing threads come in different colors and thicknesses. Choose a thread that matches the color of your fabric and a thickness that is suitable for your project.
- Needles: Needles come in various sizes and types. Choose needles that are appropriate for the fabric you’re using and the type of sewing you’ll be doing.
- Pins: Pins are used to hold the fabric in place while sewing. Choose pins that are suitable for your fabric type and sewing project.
- Scissors: Scissors are used for cutting the fabric and for other tasks during the sewing process. Choose scissors that are comfortable to use and suitable for your sewing needs.
- Measuring Tape: A measuring tape is necessary for taking accurate measurements of your body and for measuring the fabric. Choose a measuring tape that is easy to use and has clear markings.
- Cutting Mat: A cutting mat is used to cut the fabric. It provides a stable surface for cutting and helps prevent accidental cuts. Choose a cutting mat that is suitable for your sewing needs.
- Marker Pen: A marker pen is used to mark the fabric for cutting and for making other adjustments during the sewing process. Choose a marker pen that is easy to use and has a fine tip.
- Iron: An iron is used to press the fabric and to remove wrinkles. Choose an iron that is suitable for your fabric type and sewing needs.
These are the basic sewing supplies you’ll need to create your own custom dress. By gathering these supplies and tools, you’ll be well on your way to creating a beautiful and unique dress that you’ll love to wear.
Tools for Cutting and Marking the Fabric
When it comes to creating your own custom dress, having the right tools is essential. Here are some of the tools you will need for cutting and marking the fabric:
- Fabric Scissors: You will need a good pair of fabric scissors to cut your fabric. Look for scissors with sharp, durable blades that can easily cut through multiple layers of fabric.
- Fabric Marker: A fabric marker is used to mark the pattern pieces on the fabric. Choose a marker that is specifically designed for fabric, as it will adhere better to the material and not bleed through.
- Rotary Cutter: A rotary cutter is a tool used to cut out pattern pieces quickly and accurately. It consists of a blade that spins around a central pivot point, allowing you to cut through multiple layers of fabric at once.
- Ruler: A ruler is used to measure and mark the dimensions of the pattern pieces. Make sure to use a ruler that is long enough to accommodate the length of your dress.
- Pins: Pins are used to hold the fabric in place while you sew. Choose pins that are sharp and sturdy, and make sure you have enough to pin all the layers of your dress together.
- Thread: You will need thread to sew your dress together. Choose a thread that is compatible with your sewing machine and matches the color of your fabric.
- Needles: Needles are used to sew the fabric together. Choose needles that are appropriate for the weight of your fabric and the type of sewing you will be doing.
By having these tools on hand, you will be well-equipped to start cutting and marking your fabric for your custom dress.
Iron and Ironing Board
Creating your own custom dress requires a few essential tools and supplies, including an iron and ironing board. These tools are necessary for ensuring that your dress is well-pressed and looks professional.
When selecting an iron, look for one that has a ceramic or stainless steel soleplate. These materials provide even heat distribution and can help prevent accidental burns. It’s also essential to choose an iron with a variable heat setting, as different fabrics require different temperatures.
For the ironing board, look for one that is sturdy and well-made. A professional-grade ironing board will have a thick, padded surface that provides extra cushioning for your clothes. It should also have adjustable height settings, so you can easily work on clothes of different sizes.
In addition to an iron and ironing board, you may also want to invest in some extra supplies, such as spray starch, fabric presser feet, and a steamer. These tools can help make the ironing process easier and faster, and can help ensure that your dress turns out looking its best.
Measure and Cut the Fabric
Measure Your Body for the Pattern
Creating a custom dress requires precise measurements of your body to ensure a perfect fit. To accurately measure your body for the pattern, follow these steps:
- Start by measuring your bust, waist, and hips using a flexible measuring tape. Stand with your feet shoulder-width apart and wear light clothing that won’t compress your measurements.
- Write down your measurements and compare them to a standard dress size chart to determine your body type. This will help you choose the right size pattern for your dress.
- Next, measure the length of your arms from the shoulder to the wrist and the length of your legs from the crotch to the knee. This will help you determine the length of the sleeves and hem of your dress.
- Measure around the fullest part of your bust, waist, and hips to determine the appropriate amount of fabric to purchase for your dress.
- Take note of any unique body features, such as broad shoulders or a curvy figure, that may require adjustments to the pattern.
By accurately measuring your body for the pattern, you can ensure that your custom dress will fit you perfectly and flatter your unique shape.
Cut the Fabric According to the Pattern
Before you start cutting the fabric, it’s important to have the right tools on hand. You’ll need a sewing machine, scissors, a tape measure, a pencil or a fabric marker, and a cutting mat. It’s also a good idea to have some spare needles and thread on hand in case you need to make any adjustments to your design.
Once you have your tools ready, the next step is to trace the pattern onto the fabric. You can do this by laying the pattern onto the fabric and using a pencil or fabric marker to trace the outline of the pattern onto the fabric. Be sure to cut out the pattern pieces according to the instructions on the pattern, as each piece will need to be cut to the correct size and shape.
When cutting out the pattern pieces, it’s important to be accurate and take your time. Cut along the line of the pattern piece, making sure to cut out all the notches and curves as needed. If you’re having trouble getting a straight cut, try using a ruler or a rotary cutter to ensure a straight edge.
Once you’ve cut out all the pattern pieces, you can start to assemble your dress. Start by sewing the pieces together according to the instructions on the pattern. Make sure to sew the pieces in the correct order, as the order of assembly can affect the fit and look of the dress.
Add Seam Allowances
Adding seam allowances is an essential step in creating your custom dress. Seam allowances are the extra fabric added to the edges of a garment to allow for sewing and creating a finished look. Here’s how to add seam allowances when cutting out your fabric:
- Determine the amount of seam allowance you need. This can vary depending on the type of fabric you’re using and the style of the dress. A general rule of thumb is to add at least 1/2 inch to the sides and bottom of the dress, and 3/4 inch to the top.
- Use a ruler or rotary cutter to cut along the edge of the fabric, leaving a little extra fabric beyond the intended cutting line. This will create a seam allowance.
- Press the fabric flat, taking care to remove any wrinkles or creases. This will help ensure that your seams are straight and even.
- Use pins to hold the fabric in place, and then use a sewing machine to sew along the edge of the fabric. Be sure to use a stitch that will not be visible on the right side of the fabric, such as a blind hem stitch or a serger stitch.
- Once you have sewn the seam allowances in place, you can trim any excess fabric and move on to the next step in creating your custom dress.
Remember, adding seam allowances is an important step in creating a professional-looking garment. By following these simple steps, you can ensure that your custom dress fits perfectly and looks great.
Assemble the Dress
Pin the Dress Together
Before you start sewing your custom dress, it’s important to make sure that all of the pieces are correctly pieced together. One way to do this is by pinning the dress together. This will allow you to see how the different pieces fit together and make any necessary adjustments before you start sewing.
Here are the steps to pinning your dress together:
- Lay out all of the pieces of your dress on a flat surface.
- Start by pinning the front and back pieces together along the sides and shoulders. Make sure that the fabric is smooth and even.
- Next, pin the sleeves into place. You can do this by inserting the sleeve into the armhole and pinning it to the side seam.
- Finally, pin the hem in place. This will help keep it from twisting or bunching up as you sew the dress together.
It’s important to be careful when pinning your dress together, as you don’t want to stretch or damage the fabric. If you find that a piece doesn’t fit quite right, you can make small adjustments by shifting the pins or repositioning the piece. Once you’re happy with the fit, you can start sewing your custom dress!
Sew the Dress
After you have traced your pattern and cut out your fabric, it’s time to start sewing your dress. This step-by-step guide will walk you through the process of sewing your dress, from starting the seam to finishing the hem.
1. Start the Seam
Start by placing the right sides of your fabric together and pinning the edges together along the side seam. Use a straight stitch to sew the side seam, making sure to sew in a straight line.
2. Sew the Shoulder Seams
Next, pin the shoulders of your dress together, right sides facing each other. Use a straight stitch to sew the shoulder seams, making sure to sew in a straight line.
3. Sew the Sleeve
If your dress has sleeves, pin the sleeve into the armhole and sew it in place using a straight stitch.
4. Sew the Front and Back Together
Pin the front and back of your dress together, right sides facing each other. Use a straight stitch to sew the front and back together, making sure to sew in a straight line.
5. Hem the Dress
Once you have sewn the front and back together, it’s time to hem the dress. You can either use a hemming foot on your sewing machine or do it by hand. To hem the dress by hand, fold the hem twice and sew it in place using a straight stitch.
With these steps, you should now have a completed dress that fits you perfectly. Remember to take your time and double-check your work as you go along to ensure a professional finish.
Hem the Dress
Hemming the dress is an essential step in creating a custom-made dress. Hemming refers to the process of finishing the edges of the fabric to prevent fraying and to give the dress a professional finish. Here are the steps to hem your custom-made dress:
- Lay the dress out flat on a smooth surface. Make sure the right side of the fabric is facing up.
- Turn the dress upside down so that the wrong side of the fabric is facing up.
- Using a ruler or a fabric guide, mark the desired length of the hem. The standard length for a dress hem is typically about 2-3 inches from the floor.
- Use scissors or a sewing machine to cut the excess fabric along the marked line. Be careful not to cut the actual hem allowance, which is typically 1-2 inches wider than the marked line.
- Fold the hem allowance towards the wrong side of the fabric and press it in place using a hot iron or a sewing machine. This will help to secure the hem and prevent it from fraying.
- Sew the hem in place using a sewing machine or by hand. Make sure to use a strong thread that matches the color of the fabric.
- Turn the dress right side up and check the hem for any unevenness or puckers. If necessary, adjust the hem and resew it in place.
- Repeat the hemming process for the other side of the dress, if necessary.
By following these steps, you can create a beautifully hemmed dress that is both functional and fashionable.
Add Accessories and Final Touches
Choose Accessories That Complement Your Dress
When it comes to adding the final touches to your custom dress, choosing the right accessories is crucial. The right accessories can bring your look together and make it feel complete. Here are some tips for choosing accessories that complement your dress:
- Consider the Dress’s Neutral Tones: If your dress has neutral tones, such as black, white, or beige, choose accessories that complement those colors. For example, if your dress is black, choose accessories that are also black or that contrast with the black, such as gold or silver.
- Look for Similar Patterns: If your dress has a print or pattern, look for accessories that have similar patterns or colors. This will create a cohesive look and tie the outfit together.
- Consider the Dress’s Style: If your dress has a specific style, such as a halter neck or a flowy maxi dress, choose accessories that complement that style. For example, if your dress has a halter neck, choose accessories that draw attention to the neck, such as a statement necklace or a pair of hoop earrings.
- Think about the Occasion: Finally, consider the occasion for which you are creating your custom dress. If it’s a formal event, choose more sophisticated accessories, such as diamond studs or a pearl necklace. If it’s a casual event, choose more playful accessories, such as a statement bracelet or a pair of bold earrings.
By following these tips, you can choose accessories that complement your custom dress and complete your look.
Iron the Dress
Ironing the dress is an essential step in the custom dress creation process. It ensures that the dress is smooth and wrinkle-free, which can greatly enhance its overall appearance. Here are some tips on how to iron a custom dress:
- Check the Care Label: Before ironing the dress, always check the care label for any specific instructions or recommendations. Some fabrics may require a lower or higher temperature setting, and some may be dry-clean only.
- Choose the Right Iron Setting: Select the appropriate iron setting for the type of fabric used in the dress. For example, delicate fabrics like lace or silk may require a lower iron setting to prevent damage. On the other hand, thicker fabrics like denim or cotton may require a higher iron setting.
- Pre-Wash the Dress: If the dress is made of a fabric that can be washed, it is recommended to pre-wash it before ironing. This helps to remove any shrinkage or wrinkles that may occur during the ironing process.
- Use a Steam Iron: A steam iron is preferred over a dry iron because it helps to add moisture to the fabric, making it easier to iron. It also helps to prevent the fabric from becoming too hot and potentially scorching.
- Start at the Center: Begin ironing the dress from the center and work your way outwards. This helps to ensure that the dress is evenly ironed and reduces the risk of wrinkles or creases forming.
- Use Patience and Care: When ironing the dress, it is important to be patient and take care not to apply too much pressure or heat to any one area. This can help to prevent any damage to the fabric or embellishments.
- Finish the Hemline: Once the dress is ironed, it is important to finish the hemline. This can be done by either sewing it down or using a hemming tool to create a professional-looking finish.
By following these tips, you can ensure that your custom dress is ironed to perfection, giving it a polished and professional look.
Try on the Dress and Make Any Necessary Adjustments
Once you have completed all the steps to create your custom dress, it’s time to try it on and make any necessary adjustments. Here are some tips to help you ensure that your dress fits perfectly and looks great:
- Try on the dress in a well-lit room with good lighting. This will help you see any flaws or imperfections in the dress and make it easier to identify areas that need adjustment.
- Stand in front of a mirror and check the fit of the dress from all angles. Look for any gaps, puckers, or areas that feel uncomfortable. Take note of any areas that need adjustment.
- Use a tailor’s measuring tape to check the fit of the dress in different areas. Measure the bust, waist, and hips to ensure that the dress fits well in these areas. Check the length of the dress to make sure it falls at the appropriate spot.
- Make any necessary adjustments to the dress. If the bust is too big, you can use pins to gather the fabric and create a smaller bust. If the waist is too large, you can use a belt or a sash to cinch the dress in at the waist. If the hips are too small, you can add fabric to the skirt to make it wider.
- Once you have made any necessary adjustments, try on the dress again to make sure it fits well and looks great.
Remember, creating a custom dress is all about personalizing it to your liking. Take your time and make any necessary adjustments until you are completely satisfied with the final result. With a little patience and attention to detail, you can create a beautiful, one-of-a-kind dress that you will love to wear.
Tips and Tricks for DIY Dress Making
Invest in a Good Sewing Machine
A sewing machine is an essential tool for any DIY dress maker. Without a good sewing machine, you may encounter difficulties and may not be able to achieve the desired results. Therefore, it is crucial to invest in a good sewing machine. Here are some tips to consider when choosing a sewing machine for your DIY dress making:
- Type of Sewing Machine: There are different types of sewing machines available in the market, such as mechanical, electronic, and computerized. Consider your needs and budget when choosing a sewing machine.
- Features: Look for a sewing machine that has features that will suit your needs, such as adjustable stitch length and width, multiple stitch patterns, and automatic needle threader.
- Brand and Model: Research and compare different brands and models of sewing machines to find one that is reliable and fits your budget.
- Maintenance: Regular maintenance is important to keep your sewing machine in good condition. Look for a sewing machine that is easy to maintain and repair.
- Warranty: Consider a sewing machine that comes with a warranty for peace of mind and protection against defects.
By investing in a good sewing machine, you will be able to create high-quality, custom-made dresses that will last for years to come.
Start with Easy Patterns and Techniques
Creating your own custom dress can be a rewarding experience, but it can also be overwhelming for beginners. One of the best ways to start is by beginning with easy patterns and techniques. This will allow you to build your skills and confidence before tackling more complex projects. Here are some tips to help you get started:
- Choose a simple pattern: Start with a simple dress pattern that has a straight silhouette and a few basic seams. This will allow you to focus on the construction techniques rather than struggling with a complicated design.
- Use a sewing machine: While it’s possible to create a dress using a sewing needle and thread, using a sewing machine will make the process much faster and easier. If you don’t have a sewing machine, consider renting or borrowing one before investing in your own.
- Follow the instructions carefully: Even if you’re an experienced sewer, it’s important to follow the instructions carefully when working with a new pattern. This will help you avoid mistakes and ensure that your dress turns out looking professional.
- Take your time: Don’t rush through the process of creating your own custom dress. Take your time and enjoy the experience of crafting something unique and personalized.
By following these tips, you can ensure that your first DIY dress-making project is a success. Remember to start with easy patterns and techniques, use a sewing machine, follow the instructions carefully, and take your time. With practice and patience, you’ll be able to create beautiful, custom-made dresses that you’ll love wearing.
Be Patient and Take Your Time
When it comes to creating your own custom dress, it’s important to remember that the process can be time-consuming. After all, you’re putting in the effort to make something that is entirely unique and tailored to your specific needs and preferences. With that in mind, it’s essential to be patient and take your time throughout the entire process.
One of the biggest benefits of taking your time is that you’ll be able to ensure that your dress turns out exactly the way you want it to. Rushing through the process can lead to mistakes, which can be frustrating and may even result in having to start the process all over again. By taking your time, you’ll be able to carefully consider each step of the process and make any necessary adjustments along the way.
Additionally, taking your time can help you to better enjoy the experience of creating your own custom dress. Instead of feeling rushed and stressed, you’ll be able to savor each step of the process and feel a sense of pride and accomplishment as you see your vision come to life.
Of course, taking your time doesn’t mean that you should dawdle or procrastinate. It’s important to have a clear plan and timeline in place for your project, so that you can make steady progress without feeling overwhelmed. This might involve breaking the process down into smaller, more manageable steps, or setting aside dedicated blocks of time to work on your dress each day or week.
Ultimately, being patient and taking your time is key to creating a custom dress that you’ll love and be proud to wear. So, even if it feels like the process is taking longer than you had anticipated, remember to stay focused, stay calm, and take your time to ensure that your dress turns out exactly as you imagined it would.
Join Online Communities for DIY Dress Makers
When it comes to DIY dress making, there are a wealth of resources available online to help you learn and improve your skills. Joining online communities for DIY dress makers is a great way to connect with other like-minded individuals who share your passion for fashion and sewing. Here are some tips for finding and getting the most out of online communities for DIY dress makers:
- Look for forums and social media groups specifically dedicated to DIY dress making. These communities are a great place to ask questions, share tips and tricks, and get feedback on your work.
- Join communities that align with your personal style and interests. For example, if you’re interested in vintage fashion, look for communities that focus on that style.
- Be an active participant in the community. Engage with other members by commenting on their work, asking questions, and sharing your own creations.
- Use hashtags on social media to connect with other DIY dress makers. Popular hashtags include #DIYdressmaking, #sewing, and #makers.
- Don’t be afraid to seek out advice and guidance from more experienced members of the community. They can provide valuable insights and help you avoid common mistakes.
By joining online communities for DIY dress makers, you’ll have access to a wealth of knowledge and resources that can help you improve your skills and create beautiful, custom dresses.
FAQs
1. What materials do I need to make a DIY dress?
To make a DIY dress, you will need a pattern, fabric, lining fabric, thread, needles, pins, and a sewing machine. You may also need additional supplies such as interfacing, elastic, and bias tape, depending on the design of your dress.
2. How do I choose the right fabric for my DIY dress?
When choosing fabric for your DIY dress, consider the occasion, the style of the dress, and your personal preferences. If you are making a dress for a special occasion, you may want to choose a more formal fabric such as silk or satin. If you are making a casual dress, you may want to choose a lightweight cotton or linen fabric. Consider the color, texture, and pattern of the fabric as well.
3. How do I trace and cut out the pattern for my DIY dress?
To trace and cut out the pattern for your DIY dress, follow these steps: 1. Lay the pattern on the fabric and trace around it with a pencil or pen. 2. Cut out the fabric according to the traced lines. 3. If necessary, make any adjustments to the pattern pieces to fit your body. 4. Cut out the lining fabric in the same size as the dress fabric.
4. How do I assemble the pieces of my DIY dress?
To assemble the pieces of your DIY dress, follow these steps: 1. Pin the dress pieces together, right sides facing each other. 2. Sew the pieces together using a sewing machine or by hand. 3. Press the seams open with an iron. 4. Hem the dress by either turning up the edge of the fabric and sewing it in place, or by attaching hem tape to the edge of the fabric.
5. How do I add a lining to my DIY dress?
To add a lining to your DIY dress, follow these steps: 1. Pin the lining to the dress, right sides facing each other. 2. Sew the lining to the dress using a sewing machine or by hand. 3. Press the seams open with an iron. 4. Hem the dress by either turning up the edge of the fabric and sewing it in place, or by attaching hem tape to the edge of the fabric.
6. How do I finish the neckline and sleeves of my DIY dress?
To finish the neckline and sleeves of your DIY dress, follow these steps: 1. Sew the neckline and sleeves together using a sewing machine or by hand. 2. Turn the edge of the fabric up and press it in place. 3. Sew the edge in place using a sewing machine or by hand. 4. If necessary, attach elastic to the sleeves to make them fit more snugly.
7. How do I add decorative details to my DIY dress?
To add decorative details to your DIY dress, you can use a variety of techniques such as applique, embroidery, or adding lace or trim. You can also add belts, bows, or other accessories to enhance the design of the dress.